It is a GUI application to simplify the access, management of data stored in a Storage account. It provides following benefits:
- Its easy to connect and manage multiple storage accounts
- It lets you connect to Cosmos DB and Data lake.
- Used to update and view entities in your storage accounts
- It is free to download and use.
- Using it you can edit, download, copy and delete data.
- It is supported in Mac OS, windows and Linux.
Azure Storage explorer supports all Azure storage services:
- Azure Blob Storage: It stores unstructured data as a binary large object (blob)
- Azure Table Storage: Store NoSQL, semi-structured data
- Azure Queue Storage: Store messages in a queue which can be accessed and processed by application through https calls.
- Azure Files: It is a file sharing service , similar to traditional file servers. It works on SMB protocol.
- Azure Data Lake Storage: It is used to store large data volumes, can can store structured and unstructured data.
Local Emulators: You can use Local emulator to avoid additional costs of Storage accounts in case your project is in development phase. It supports two emulators:
- Azure Storage Emulator: It uses a local instance of Microsoft SQL Server 2012 Express LocalDB. It emulates Azure table, Queu and Blob Storage.
- Azurite: It is based on Node.js, it is an opens source and supports most Azure storage commands through an API.
Install Azure Storage Explorer:
- Download the software from: https://azure.microsoft.com/en-gb/features/storage-explorer/?azure-sandbox=true
- For Operating system, select your preferred operating system. The following steps will go through the Windows version of the application. Your steps will be different if you’re using a different OS.
- Select the Download now button to download the Storage Explorer installer application to your computer.
- Locate the downloaded file and run it. For the Windows version, use the StorageExplorer.exe file.
- Accept the license agreement, and select Install.
- Browse to the location where you want to install Storage Explorer, or accept the default location. Then select Next.
- For Windows installations, select the Start menu folder. Accept the default and select Next.
- When the installation is complete, select Finish.
- Open the Storage Explorer. Select Azure in Azure environment and click next.

10. Use your Azure Credentials to sign in:

11. When you signed in, associated azure account and subscription will appear in the Account Management.
12. Confirm the details and click Apply
Create a Storage account and add a Blob:
- Run the command in Azure shell:
az storage account create \ –name example$RANDOM \ –resource-group learn-888c9168-0821-4478-b6d5-0ed48cc51f0f \ –sku Standard_GRS \ –kind StorageV2 - In the Storage explorer, refresh all and then locate your subscription.
- Locate your Storage Account, it will show Blob, Files share, Queues and Tables.
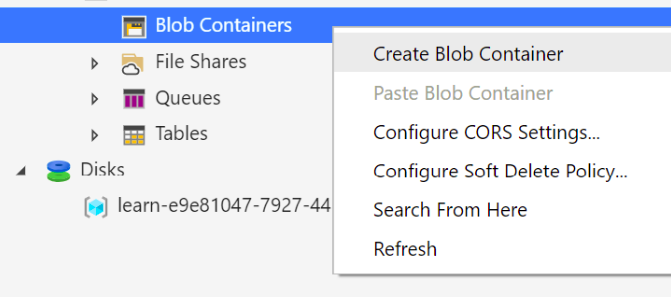
4. Click on create blob container and name your container and press Enter.
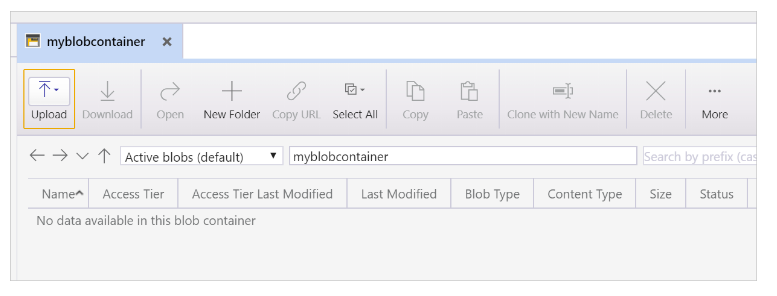
5. Upload a blob to the container.